This is default featured slide 1 title

Go to Blogger edit html and find these sentences.Now replace these sentences with your own descriptions.

This is default featured slide 2 title

Go to Blogger edit html and find these sentences.Now replace these sentences with your own descriptions.

This is default featured slide 3 title

Go to Blogger edit html and find these sentences.Now replace these sentences with your own descriptions.

This is default featured slide 4 title

Go to Blogger edit html and find these sentences.Now replace these sentences with your own descriptions.

This is default featured slide 5 title

Go to Blogger edit html and find these sentences.Now replace these sentences with your own descriptions.

About Us

ABC

You are Welcome

Thank you for visiting LV Car Wash and Care Auto Detailing.
We pride ourselves on honest, quality, valuable work.
If you have any comments, questions, or feedback feel free to contact us!
Thanks again for viewing this blog and we hope to be seeing you again.

Phone: +6012-305 8715 or +6012-315 1516

Showing posts with label Detailing NEWs. Show all posts

How can I achieve the perfect finish? Car Polishing Detaling Malaysia


5 Steps to a Perfect Finish

One of the most common questions asked by serious car enthusiasts & car owners in general is “How can I achieve the perfect finish?” Many car owners wonder how their friend’s 10 year old daily driven car is still in immaculate conditions, as it was released from the showroom or even better!

Keeping a car in pristine conditions throughout its entire life is quite easy but requires some knowledge. The problem is that many professional car detailers conceal their tricks of the trade. In this article I have decided to share the secrets & you will be impressed how a car can be kept looking at its best with just 5 easy steps, which are highlighted below.

5 Steps to a Perfect Finish 
Let us take a look at each step in more detail:
Step 1: Washing
I cannot emphasize enough that car washing is one of the best treatments a car can get in the art of car detailing. However, car washing should be executed with extreme care because it can act as a double-edged sword. Amazingly enough, 95% of swirl marks are inflicted by inappropriate washing techniques & cheap utensils.

Car Shampoo
One of the most important & the most overlooked product is car shampoo. Most car enthusiasts are meticulous when it comes to polish & wax selection, but will most of the time go for cheap car soaps. Cheap car soaps & dreadful dish washing detergents will rob essential oils & strip wax protection leaving paintwork exposed to the elements. Cheap car soaps will waste your time because they will dissolve that wax layer that you dedicated so much time & effort to apply. A quality car shampoo should clean your car thoroughly without dissolving wax protection. Instead a quality car shampoo should enhance gloss & protection. It should provide enough lubricity for your wash mitt to glide smoothly over paint without inflicting frustrating swirl marks & should be rich in paint conditioners that nourish your vehicle’s paintwork & replenish those essential oils lost through evaporation. In addition, a quality car shampoo should produce persistent suds that last throughout your entire washing procedure.

Recommended product: Sonus Gloss Shampoo

Wash Mitt
A few years ago natural & synthetic sponges were popularized for car washing. The main advantage of sponges is that they absorb large quantities of washing solution which help to lift grime & lubricate the surface being washed. The main disadvantage on the other hand is their solid surface which provides very little or no room at all where particulate matter can be trapped & kept away from the surface being washed. Modernization has largely replaces traditional sponges with microfiber sponges or wash mitts. These have the same advantages as traditional sponges in terms of water retention but the spaces created between millions of fibers will reduce swirl marks dramatically by trapping large quantities of particulate matter. However, these have been superseded by natural sheep skin wash mitts. The main advantages of these type of wash mitts is their super soft texture & longer fibers which trap particulate matter more efficiently.

Recommended product: Sonus Ultimate Wash Mitt


Drying Towels
Today, natural & synthetic chamois are still popular amongst car enthusiasts & car owners in general. The main problem with these type of drying utensils is drag, which unbelievably strips wax protection to some extent, & their inability to absorb water completely, leaving behind invisible streaks that reduce shine & create water spots. Silicone squeegees are renowned for their ability to dry cars in minutes but should be considered as swirl mark factories. This is due to the fact that silicon squeegees are too stiff to cushion particulate matter & will simply drag any dust across paintwork. Without cushioning, these particles will create superficial scratches that will be revealed in direct sunlight as gleaming cobwebs. Although it is very difficult to convince, microfiber waffle-weave towels should be considered as the ultimate drying utensil. However, not all microfiber waffle-weave towels have the same water-absorption capabilities. The best towels are those with a 70/30 percentage blend of polyester & polyamide, respectively. These towels are calculated to absorb 10 times their weight in water & produce a streak-free finish. Microfiber towels are so soft that they will cushion any dust particles, reducing swirl marks considerably.

Recommended product: Sonus Der Wunder Microfiber Drying Towel

 Step 2: Claying
BEFORE CLAYING
Automotive detailing clay consists of a plasticine-like material impregnated with special abrasives. In contrary to popular believes claying will not remove paint. Claying will glide smoothly over a special lubricant & will only remove contaminants that sit on paintwork. In this way clay can neither remove swirl marks nor contaminants that have penetrated deeply into the paintwork. Many individuals still don’t understand the concept of claying. Basically our vehicles are continuously bombarded by a myriad of environmental insults. Paintwork can be shielded against most of these contaminants by regular applications of a pure premium wax. However, the slightest neglect will cost you a lot. The point when wax protection is at its weakest or worse when the wax degenerates completely is a golden opportunity for environmental contaminants to stick to your vehicle’s precious paintwork. Such contaminants will literally glue to the paintwork & will be practically impossible to remove by normal washing. If neglected, these contaminants will penetrate deeply & stain the finish. Direct sunlight will bake these contaminants giving rise to harmful byproducts that will oxidize the finish. This process will not occur in an overnight & may take several years to show its devastating effects. Like cancer, these effects will usually be noticeable when the finish has incurred large quantities of damage & it’s too late to remedy. For this reason, such contaminants should be clayed as soon as possible at least on a 6 monthly basis. Claying will not only prevent expensive damage but will also expose your vehicle’s finish making it more radiant.
AFTER CLAYING

Types of clay
You can find a wide variety of automotive detailing clay. Some vary only in color, whereas others differ in aggressiveness. The major difference between a mild & an aggressive clay bar is that aggressive clay removes superficial contaminants faster. The problem is that aggressive clay may also inflict microscopic scratches in your vehicle’s finish making it look dull. This dullness can be remedied by polishing, but aggressive clay is better left in the hands of professionals. For car enthusiasts we always recommend fine clay which gets the job done safer & without the need of subsequent polishing.

Recommended product: Sonus SFX Ultrafine Deatiling Clay & Sonus Glyde Clay Lubricant

Step 3: Paintwork deep cleansing

BEFORE PAINT CLEANSING
As already mentioned, with inadequate protection certain contaminants manage to penetrate deeply & stain the finish. If dealt with immediately, such stains can be abolished with special products commonly referred to as paint cleaners or paintwork cleansers. Although they are identical to traditional polishes in terms of consistency & mode of application, paint cleansers work a little bit different & contain chemical abrasives rather than mechanical abrasives. These special solutions will dissolve deeply embedded stains & abolish them completely without harming paintwork. Here we need to emphasize that quality paint cleaners will not remove paint. They will simply purify paint (& its overlying clearcoat) making it clearer & more reflective.
 AFTER PAINT CLEANSING
Step 4: Polishing
BEFORE POLISHING
Polishing is the process by which a superficial layer of paint is removed to reveal a new surface. Polishing removes surface defects, such as oxidation, scratches & swirl marks, thus smoothing the surface. Polishes exist in various grades & they should not be used without the appropriate knowledge. Polishes can be considered as sand paper in liquid form. Like sand paper, polishes contain abrasive particles that “sand” paintwork at the microscopic level. Different grades of polishes contain abrasives of different size & shape. By convention, the larger the particles, the more paint is removed per stroke. Some polishes are so aggressive that their constituent abrasive particles can be felt when the polish is rubbed between your thumb & index finger. Many individuals think that one single polish can do all jobs, but this is not the case. Different paint conditions require different polishes. For instance, an aggressive polish would be fine for a severely neglected vehicle, but will be catastrophic for a brand new vehicle, even if the finish created looks superb to the naked eye. An aggressive polish can produce quite good finishing but it removes large quantities of paint. Many individuals think that because no color is transferred to the applicator while polishing, the product they are using is harmless. The problem is that very few individuals know that modern paintwork is covered with a clear coat. As the name suggests, the clear coat is transparent & will not release any color no matter how hard you polish. Color transfer will only occur when the clear coat has been completely eradicated. Here we should emphasize that the paint system will fail if only 1/3 of the clear coat is removed. Therefore it is essential that you stick with a trusted brand that provides a variety of polishes with different grades of abrasiveness. A Classical example is Sonus Corporation, which provides 3 different polishes, each of which can be used on its own or in combination to tackle different situations. The table below shows the function of these polishes:

ProductUseCar Condition
Sonus SFX1Renovation of severely neglected paintSeverely Neglected
Sonus SFX2Swirl Mark RemoverBrand new to well-conditioned
Sonus SFX3High Gloss FinishingBrand new to well-conditioned
Although coarse polishes will remove paint defects very efficiently, they will remove large quantities of paint & will inflict microscopic marks called micro-marring, which can be removed by a finer polish. If you have a well-conditioned car with only a few swirl marks, & you use an aggressive polish, chances are that you will remove the swirl marks completely (together with large quantities of paint) but you will still be unhappy with the finish. This is because aggressive polishes produce haziness. Sometimes this haziness is too mild to be obvious, but will be pronounced when you park next to a professionally detailed vehicle. Brand new or well-conditioned vehicles should be polished at maximum twice a year with a fine polish, such as Sonus SFX2. Although this polish provides exceptional finishing, we recommend following up with Sonus SFX3 for a mirror finish. Reserve an aggressive polish, such as Sonus SFX1 for relatively deep scratches that occur from time to time.
AFTER POLISHING
Recommended products: Sonus SFX1 Restore Polish, Sonus SFX2 Enhance Swirl Remover, Sonus SFX3 Final Finish Polish

Step 5: Protection/Waxing
WITHOUT WAX
Waxing is one of the most important treatments because it will protect your vehicle against a myriad of environmental insults, which include bug, tar, soot, factory fallouts, salt, mist, acid rain, tree sap & bird droppings to name but a few. Regular waxing will keep your vehicle in pristine conditions & will prevent more time consuming & laborious procedures because it will prevent oxidation & inhibit binding of environmental pollutants. Vehicles should be waxed at least every 3 months & if you’re serious about protection, you should also apply a spray wax every week after washing. Waxing is easier than polishing because it doesn’t require any hard rubbing. Simply spread the product as thinly as possible using light pressure, allow it to cure for the recommended period of time & then buff with a quality microfiber towel. Once again, always use quality products that will offer serious protection. Trying to get the job done with a cheap product is simply a waste of time & money.
WITH WAX

Recommended products: Sonus SFX4 Paint Sealant, Collinite 845 Insulator Wax, Collinite 476s Super Double Coat Auto Wax

Regular Maintenance
After you have performed the 5 listed steps in the right order, all you have to do is to maintain the beautiful finish by frequent washing at least every week, & regular waxing at least every 3 months. Your vehicle will also benefit greatly from a weekly spray wax. This will prolong the shelf life of the liquid/paste wax & boost shine. The entire procedure can be repeated every 6 to 12 months depending on the level of protection (i.e. wax quality & compliance) & the type of shampoo & washing/drying utensils used. By applying a quality wax regularly you will keep the finish shining & contamination-free, whereas by using the right shampoo & washing/drying utensils you will keep swirl marks to the minimum. So practically you can go a long way with just frequent washing & regular waxing.

Malaysia Car Detailing Guru presents Rotary Machine Polish Intense course

to be or not to be?


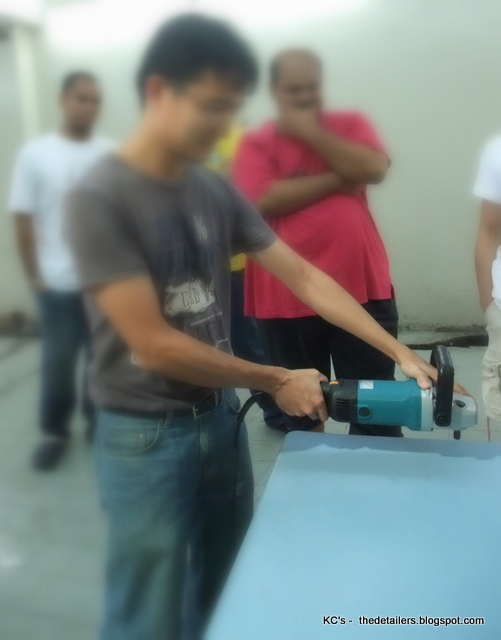
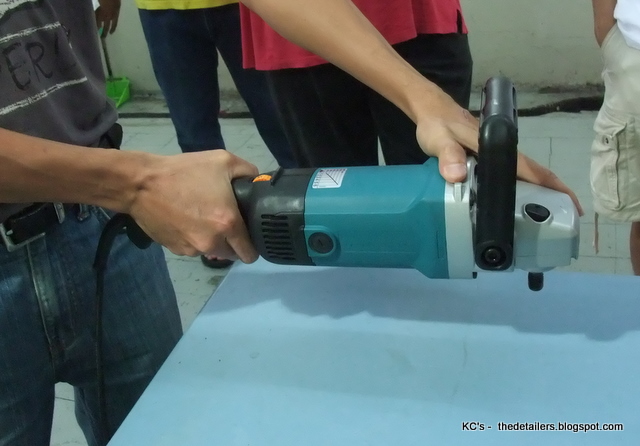
Rotary polisher are best to be removed scratches, swirls and compounding marks left behind from the inexperienced (previous hacker) BUT also the worse in ruining one paint....it is highly recommended that rotary polishing should be only handled by experienced detailers only.is this the right way to handle a power tool?


we cover the Basic Handling Techniques .... & remember with a high tourque level are dangerous like any other power tool

may results -
Over-extension, repetitive motions, high forces Vibration
Slips – when on improper footing, even Trips – trailing cables, Chemical hazards from cleaning solutions, electric shock

Confucius sayings "knowing oneself & knowing your enemy - will win the battle"
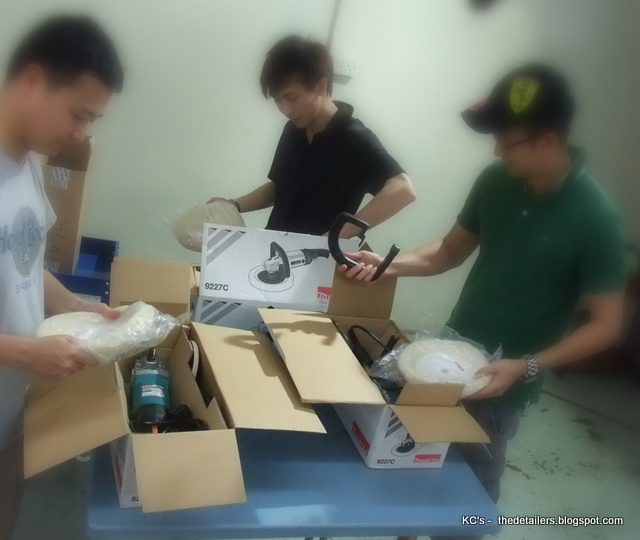
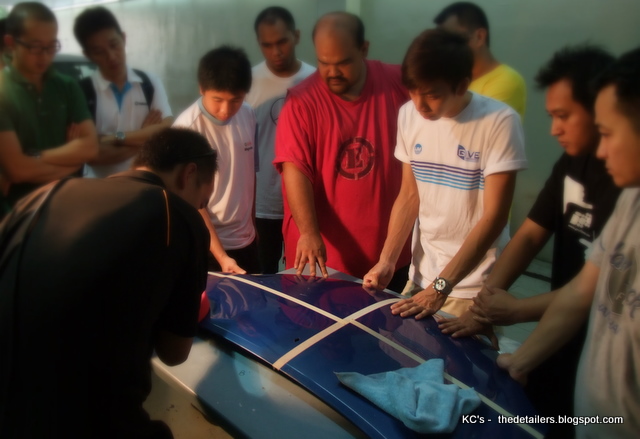
congrats to the 5 new owner -


unwrapping their new baby..... just like gift from above

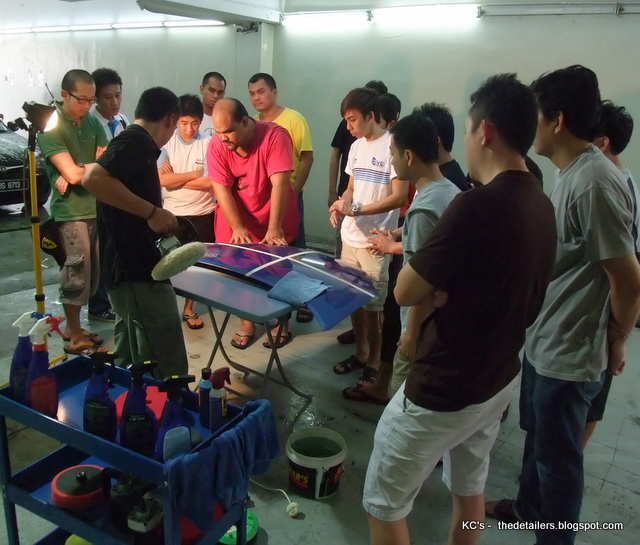
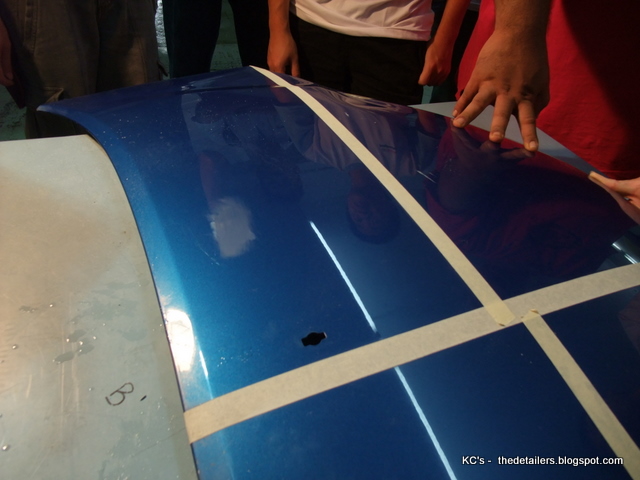
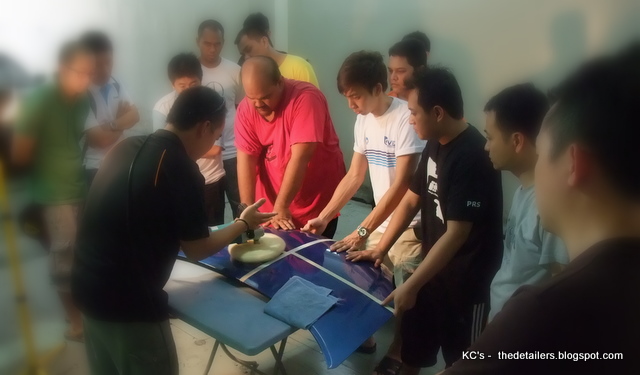
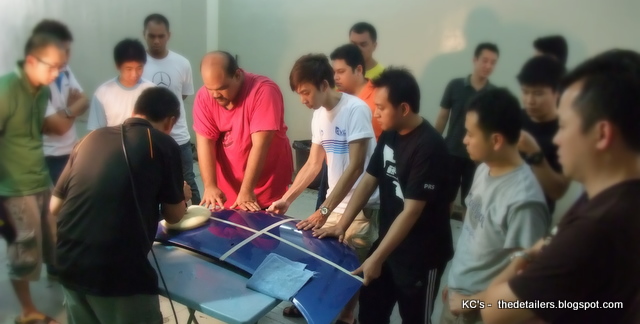
master seech begins the class with - study of paint damage, swirls infliction


RIDS.....random isolate deep scratches???? remedy for restoration

eg. how would you clear this 1500 grit sanding marks

close up


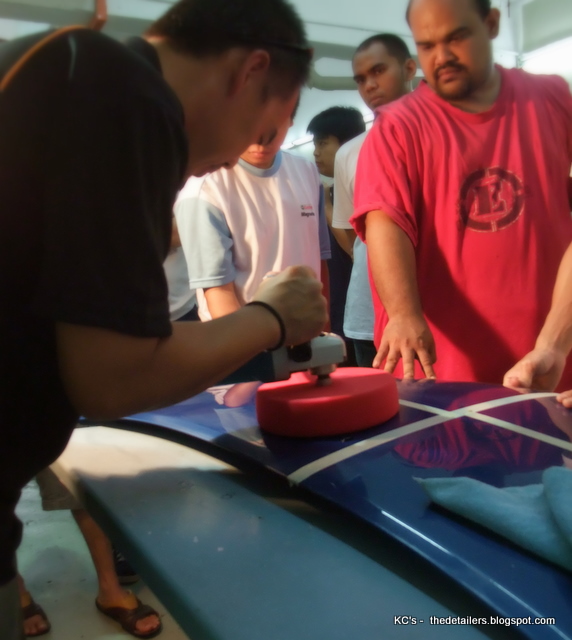
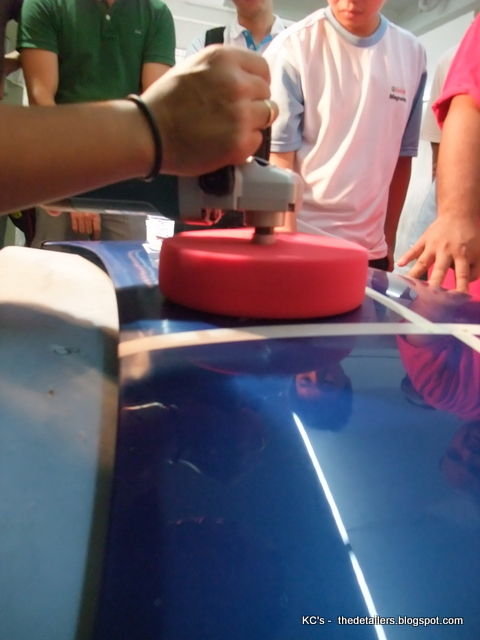
master seech carefully showing the right techniques of handling the machine


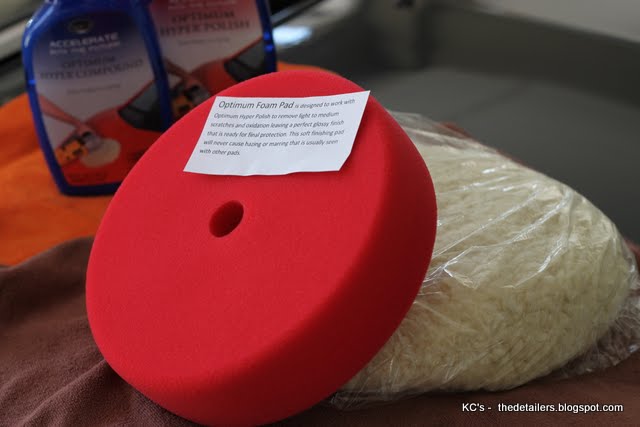
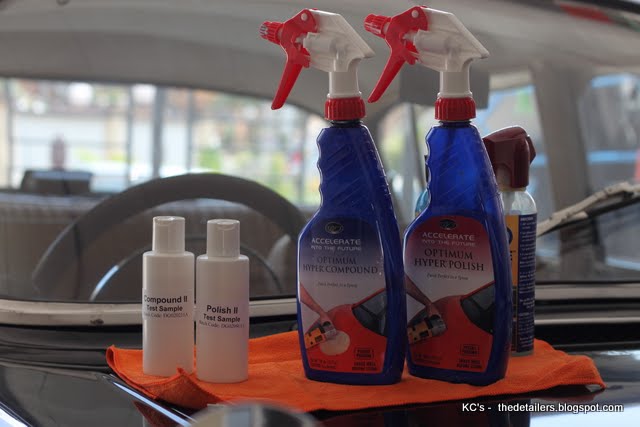
how by using just the new optimum double side foam pad & optimum hyper spray POLISH ....enabling him to do the job


at work


remember


ta da
wipe


now


mirror finish again


how from this


now ta da


Later we move on to paint study, paint damages,


the root caused of clear coat paint failure mostly by paint poor preps job & road side car wash (harsh chemicals)

sanding marks prior painting - resurface after paint cured


a very common scene here
boils down to poor preps prior painting -


look at how factory paint still remain good on top of the worn out CC paint

Less is more - if we handle it well ...it shouldnt be repainted

the secret of handling the machine is

practice - cords behind yr shoulder, always starts at the minimum speed & gradually increase...the max is to speed 3 - 1200 will be sufficient for tropics climate like us - as our paint melts under the extreme equator lines....

remember the secret is to keep your pad flat...at all times


thanks to the brilliant magic portion of Doc G


it has been another wonderful time of lesson & knowing so much new friends


Our little effort in sharing our knowledge to trains others in car detailing..... thanks to Master seech who came & taught us

Safest Way To Remove Windscreen Watermarks Effectively

Waterspot or watermark is a very common problem. Most cars are constantly being subjected to the Daily harshness of acid rain, Contaminants in the air, Hard water, etc and Left off drying in the blazing sun.

The severity of water spot and mark usually depends on how well the surface of the paint or glass is being protected. A severe water spot and mark usually stems from Residue or Chemicals in the water droplets or streaks reacting with the surface (paint, glass, plastic, rubber) and Leaving a very unsightly mark.

This article that I am posting here has nothing to do with paint correction but treating the effects on glass instead. My daily driver, my K-car, has been under constant abuse day in and out and left in the open 24/7. With little or no protection except a weekly car wash for the past 9-years, one can expect all sort of problems. This is also my guinea pig on my journey venturing into the wonderful world of detailing. Watermarks is present on all windows. Some windows more severe, some less. 

The thing that Bugs me the most is when driving in the morning or heavy rain. The water spots or marks Causes poor visibility. Even the effectiveness of the wipe blade is reduced. The window on the driver and passenger side is Blurred and thus causing problems when trying to view the side mirrors.

Ok, less talk and more action. I am going to depict the watermark problem, corrective action and subsequent protection to the glass surface in the following pictures with description for one of my car windows. The sequence of correction to remove the watermark starts from the least aggressive method first as the severity of the watermark is unknown.

First of all, let's take a look at the test subject. A window that has been left unwashed for a day.

Figure 1: Unwashed window

Not too bad or dirty. However, there are still minute particles and dirt which I will clean up quickly with my regular combo:
1. Optimum no-rinse wash aka ONR
2. Cheap wooly MF for ONRing the glass
3. Osren white chamois for drying off the glass
4. Osren premium microfiber towel to buff dry and residual water and pick up any lint left behind


Figure 2: ONR kit
Here is a picture after cleaning the glass with ONR. You can clearly see watermarks or spots all over the glass. ONR stands no chance in removing the watermarks.


Figure 3: After ONR wash, watermarks still visible
Next, I use the following:
1. Optimum no-rinse clay lube ratio
2. Soft-99 detailing clay
 Figure 4: Clay and clay lube to see if it does any good to the watermarks

After claying, the glass did feel smoother with the clay picking up some embedded surface contaminants. However watermarks are still visible.


Figure 5: After ONR wash, watermarks still visible
Next up in my arsenal, OPC 1:3 diluted ratio

Figure 6: OPC 1:3 diluted
After using OPC 1:3, there are some visible contaminants picked up by observing the MF cloth. It is not a solution to the water streaks. But lets inspect for watermark or spot on a dry surface.


Figure 7: After washing off OPC 1:3, water streaks clearly visible. This bothers me the most.
After drying... watermarks or spots still there. Already done several OPC 1:3 cleaning and wipe downs but to no avail. Guess the water marks is already etched in.


Figure 8: Water marks still visible after OPC 1:3 cleaning
Now, from reading forums and asking people around, there is usually two solutions which people would recommend:

1. Acid based cleaner - Good in removing watermark or spot but Never use it on a scratched glass or wiper area - the acid May seep in through the crevices and cause more problems. Might cause Hazing to the glass. Might eat or damage paintwork, plastic, rubber, etc if not handled with care. Dangerous to skin. Need to keep running water at bay to wash off ASAP after use. Handle with great care!!!!!
2. Glass polishing - Polishing is by means of using abrasives to Remove a thin layer off the surface in order to remove imperfection. Problem here glass is a very hard material. The front car Windscreen is usually laminated glass and made up of softer glass. All the rest is usually tempered glass which is way harder. Based on my experience, the regular paint compounds with the harshest rotary pads seems like using very fine polish on glass - not much correction. You would need rocks or diamonds to really give glass any cut. There are special glass polish or compounds which contains Cerium Oxide but is a little hard for me to obtain at the moment. There are also other tools and abrasives out there that designed for polishing glass.

Knowing the options available to me from above, I chose #2. The acid based cleaners are simply too dangerous to my linking and the outcome is a bit unpredictable. So I went to Osren to find out more on what they have in store to help me solve my watermark problems. The safest prescribed remedy:

1. Osren abrasive powder based watermark remover
2. 3M microfine sanding pads


Figure 9: Osren abrasive powder based watermark remover and 3M microfine sanding pads to the rescue
Osren abrasive watermark remover is pretty simple and safe to use. All you needed to do is mist the glass surface work area, spread some abrasive powder on a damp sanding pad and work on the area. Not too wet and not too dry. If the pad do get dry after working on the surface for a period of time, spray some water not on the glass but on the back of the pad to get going. This prevents the sanding slurry from running all over the place. One tip is to cling wrap the metal panels underneath the glass to prevent marring the paintwork and the messy clean up process. Work on horizontal lines, then vertical lines to ensure even and edge-to-edge coverage. Wash down properly once you think you are done!


Figure 10: Sanding slurry
After using the abrasives, be sure to do a proper clean down on the glass and all other panels underneath the window. You really don't want the harsh abrasives to mar the paint work!
 Figure 11: Check out the zero water beading on the glass surface after sanding down with the abrasives! Notice the water tension surrounding my finger!


Figure 12: After removing my finger...

Figure 13: After a quick wipedown with ONR, Tadaaaaa! Water beads return!

Figure 14: Water spots or marks gone!
After the sanding process, there is almost no watermark or spots to be found! Glass appears clearer and very very smooth - better than after claying. What is left behind is the scratches and pits on the glass. I've done on a test spot, no matter what pressure or amount of abrasives used, it is almost impossible to level out scratches and pits on the glass. For that, you would need some real glass cutting compound.

I did notice that the scratches or pits is visible with a strong white LED back light. If possible shine along the edge of the glass.


Figure 15: Notice the pits on the glass highlighted by the LED backlight?
And lastly, the final protection with Opti-seal and the short nap side of Osren's premium MF towel.


Figure 16: Opti-seal for protection
Thanks for viewing.

Disclaimer:
- I've tested only on tempered glass on my car. Don't know if the abrasives would cause scratches on laminated glass.
- This is a DIY project. Always do a test spot first.
- Don't blame me if something bad happens! Share what you know.
- No I'm not selling any of the products or providing any services! Don't ask me for price!


Figure 17: Tested on temperlite glass. Oh, yeah it is Jan 01, 2013. Buckle up on the rear!!!
Night shot with street lighting - reflective and transmissive light source.

Figure 19: Reflected light source. No sanding marks or marring visible.

Figure 20: Transmissive light source. Just pits/scratches and defects within glass. No watermarks.

Here are some pictures of a condition that you should Avoid using acid based watermark cleaners (besides it being dangerous to handle) as consulted from Henry @ Osren. Take note that I have already removed the watermarks on the rear windscreen. Whatever that is left behind are scratches and pits which is not possible to remove with my techniques above. 

Acid can get into the crevices of the scratches of the wiper blade area and cause hazing and poor visibility. Also indicates why you should always try to keep your car clean. Don't forget to clean your wiper blades properly and regularly. Even if glass is harder than paint, clear coat, it can still be scratched! The more the scratches and the deeper it is, the more streaks and poor visibility during a rainy day. Same goes to those who use opti coat on their paintwork, it is not a bullet proof or permanent coating. It acts as another layer of protection that's all!


Figure 21: Rear wind screen, tempered glass with wiper blade scratch marks


Figure 22: Zoom in of scratch marks

All feedback appreciated!

Follow Us

We all LOVE our cars. And perhaps our proudest moment is when the car is new and looks its BEST.
However, is not like a painting which serves its purpose in a controlled and safe environment.
It is subjected to all sorts of abuses including the sun, dirt, and smog, all of which can affect the best automobile.
But you can keep your car in NEW CONDITION just like a painting protected in a museum.
Our LV Car Wash and Care Services Auto Detailing
"Secrets of the Experts" site will show you how!!
OR
Contact us
Phone: +6012 315 1516 or +6012 305 8715